Transform your Shopify store with interactive 3D products. This step-by-step guide will walk you through embedding 3D viewers into your product descriptions, helping you create an immersive shopping experience that keeps customers engaged.
.png)

Open your Shopify Product
Log into your Shopify Admin dashboard.
• Click on Products in the left-hand navigation menu.
• Select the specific product where you want to add the 3D viewer (for example, a "Bose Headphone").

Copy the Link from colormass
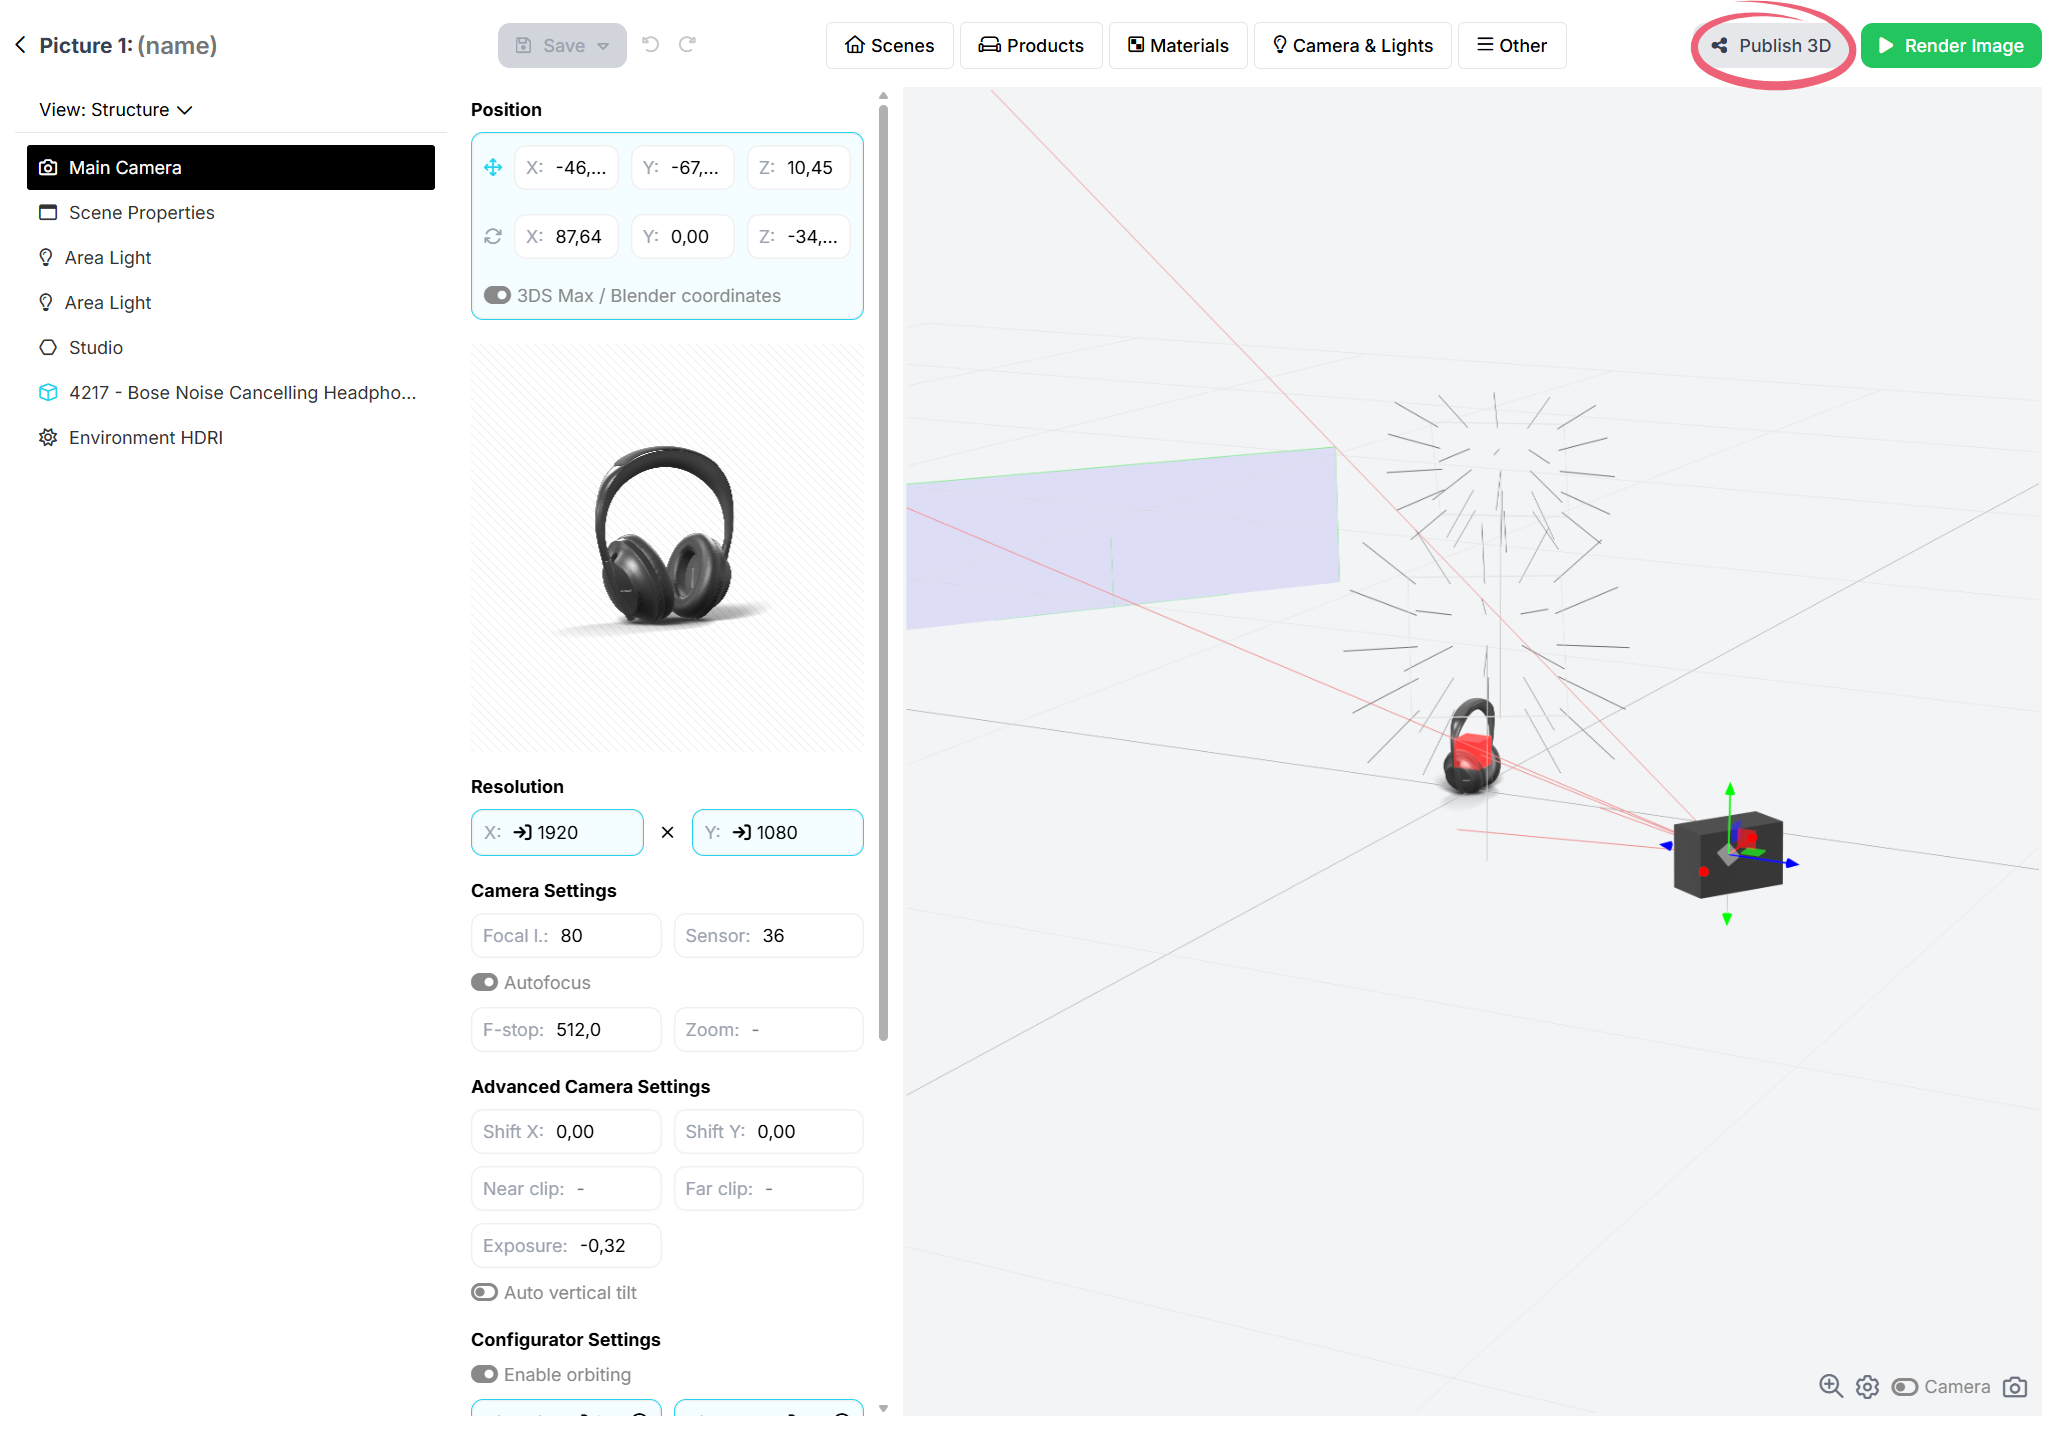
Next, open your 3D configurator setup in the Colormass platform. Click Publish 3D → Copy Configurator URL.

Embed iFrame
Once you are on the product edit page, locate the Description text box.
• Click the Show HTML button (the </> icon) located on the far right of the description formatting toolbar.
• Paste your iframe code snippet into the code editor, placing your copied colormass link inside the src="" attribute.
It should look similar to this:
<iframe
    src="YOUR CONFIGURATOR URL HERE"
    style="width: 100%; height:100%; border:0"
    allowfullscreen=""
></iframe>
See the code copied in the corresponding field below:
.png)
Once you have pasted the code:
• Click the Save button at the top right of the page to apply your changes.
• Click the Preview button (or navigate directly to your live storefront) to see the result.
The 3D viewer will now seamlessly load alongside or in place of your traditional product media, allowing your customers to interact with the 3D model in real-time!
.png)